
Epoxy Floor Installation: What to Expect

The Short Answer
The process has five stages: a concrete evaluation, surface grinding and cleaning, damage repair, applying the coating layers in sequence and allowing the floor to cure. Your installer looks at your slab in person and walks you through the plan before any work begins.
What Happens During Professional Epoxy Floor Installation?
01
Evaluate the Concrete
02
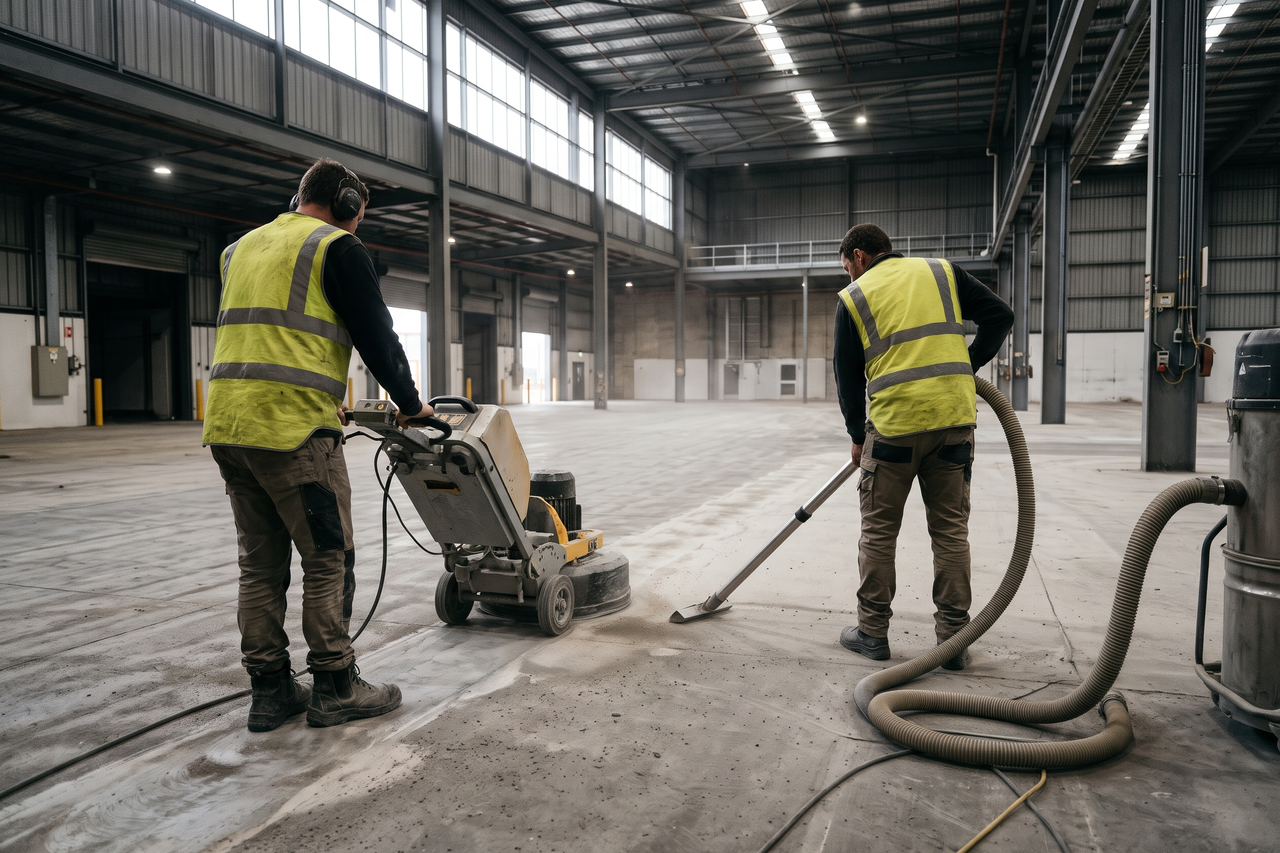
Prepare the Surface
03
Repair Cracks and Defects
04
Apply the Coating System
05
Allow the Floor to Cure
What Makes a Professional Installation Different?
Two floors that look similar from the doorway can prove very different on closer inspection. One might hold elevated moisture, leftover coating and active cracks, while the other is dry, clean and stable. A professional evaluation catches those differences rather than handling every slab the same way.
Early coating failure usually has a cause that can be identified. Preparation is often part of the problem, and moisture, the product selected and conditions at the time of application can contribute as well. Handling each of these carefully builds a better foundation for long-term performance.
When you want to talk through your own floor, share a few details about the concrete and request a customized quote.
Why Concrete Preparation Matters
For a closer look at grinding methods, crack repair and moisture testing, including how each step is handled in practice, see how concrete gets prepared for a coating.
Epoxy grips concrete mechanically. Grinding exposes the open, porous structure beneath the surface, and the liquid coating works its way in and anchors itself. Sealed, painted or highly polished concrete gives the coating very little to hold onto, so a bond on an unprepared slab begins at a disadvantage.
The preparation a floor needs depends on what it has been through. A newer slab that has never been sealed asks for far less than one buried under old paint, mastic or layers of sealer. Your installer bases the preparation scope on what the surface actually reveals rather than a one-size-fits-all routine.
Repairing Cracks and Surface Damage
Repairs are made while the concrete is fully exposed. Removing old coatings and profiling the slab shows the real extent of cracks and weak spots, so each can be addressed before primer covers it up and makes it harder to reach.
Each crack is evaluated individually. A shallow, stable crack calls for a different treatment than one that is widening or has one side higher than the other. Movement may require a flexible filler or a more extensive repair, and your installer explains the plan for each defect before going ahead.
Applying a coating over an unrepaired crack leaves the problem underneath. The finish may begin to lift along the crack edges, and an active crack can eventually telegraph through the new surface. The exposed-slab stage is the time to deal with damage properly.
Applying the Epoxy Coating System
To compare durability, UV performance and application side by side, read our epoxy and polyaspartic comparison.
With the surface prepared, the system is applied in sequence. The primer penetrates the profiled concrete and forms a stable base for the layers above. When the design calls for decorative flake, the chips are broadcast into the wet base coat so they embed before it sets.
The topcoat is the layer that absorbs daily wear from footwear, tools, vehicles and cleaning products. The product, number of coats and film thickness are chosen for the demands of the space; a commercial floor carrying heavy equipment and regular chemical exposure needs a different build than a home garage that sees light use. Because temperature and humidity affect how each coat builds and bonds, both are tracked throughout.
How Long Does Epoxy Flooring Take to Cure?
Wondering what drives project pricing? What an epoxy coating costs and why covers how size, condition and the chosen system affect the total.
A freshly coated floor becomes ready in stages, not all at once: foot traffic first, then vehicles, then full chemical resistance. Loading it up too early, before the relevant milestone, risks marks or damage that are difficult to correct.
Full chemical resistance develops only after the coating has completely cross-linked through its film. The surface may feel hard well before that process is complete, so firmness alone does not signal full readiness. Expect your installer to lay out the timeline in advance, because it varies with the floor’s size and condition, the preparation involved and the system applied.